Tuesday, April 26, 2016

Age Homebrew in Bourbon Barrels


In January, I ordered and received my first barrel, a five gallon Balcones bourbon barrel from Homebrewing.com. I did a lot of reading, comparing full 55 gallon sizes with the popular 15 and 10 gallon sizes available to homebrewers...dimensionally, I was interested in surface area. Larger 55 gallon, and medium 15 and 10 gallon varieties allow for greater volume of beer, but with volume, comes depth, and a smaller amount of surface area. Smaller barrels mean lower volume, but greater surface area. So what does this mean? It means the greater surface area allows for the beer to interact with the bourbon soaked oak more often per square inch, leading to more intense aroma and flavor profiles in a shorter amount of time. 

My first beer to test this theory out the gate was my 8.5%ABV American Strong Ale named BattleAxe. The intent, the ten gallon batch would be split to two five gallon segments, both receiving time in the barrel. The key to barrel aging is taste...tragic, I know. Pull too early, less of the bourbon and oak character you were aiming for. Pull too late, too much oak tannins, overpowering bourbon, and longer conditioning time to let the beer settle. I went with weekly tasting...Friday's to celebrate the end of the work week. This allowed me to grasp how the beer was progressing over time, and estimate when it would be where I wanted, which was a balance of the strong ale I know and love, with an equal bourbon and oak character that would peak through the aroma and flavor profile. 

For the first batch in the five gallon barrel, it took four weeks...and I was late...the Balcones barrel kicked off magnificent vanilla, caramel and coconut notes from the oak and bourbon, but it was strong...in FOUR WEEKS!!! I'm not complaining, it was a killer beer, I kegged it, and immediately reloaded the barrel with the second five gallons.

The second five gallons took a few more weeks, By week seven it was perfect. Any more would have brought oak tannins to the tongue that would accent the bitterness in a negative way, which would take a few months to condition out. The weekly tastings proved to be extremely important, and extremely enjoyable!


I entered the beer in the Harrisburg Beer Week Battle of the Homebrew Clubs...my gift to the great people of Harrisburg. Although it did not win the competition, It was very well received. I literally saw the face of my patrons melt upon tasting this beer. They stated it was a beer they could sit and relax with, take in a movie, or enjoy deep conversation with friends. 


For me, this barrel changed how I perceived Homebrewing, and gave me a look into the future. We can add beer to these fine barrels, but what if we added other ingredients to the barrels prior? What about coffee beans, vanilla beans, cocoa nibs? Let these ingredients
sit in there for a few weeks without the beer, then pull them and fill with beer. What will that bring? What about adding real coffee? Maple Syrup? Peanut Butter?....ok that may be too far, 

The lesson learned? Change with the game or change the game? I just bought my second barrel today...game on!

Sunday, January 10, 2016

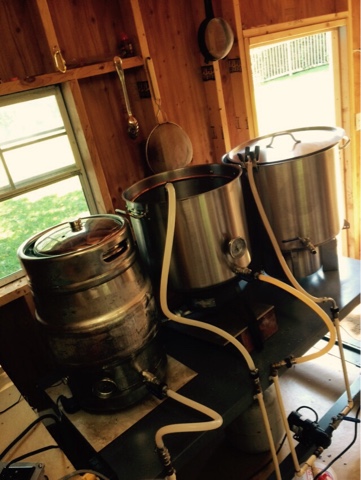
Equipment Pictures

Here are some shots of my homebrew equipment...just for fun. Happy Sunday!

Happy New Year!

I apologize for not posting more content in 2015, especially since it was such an amazing year for me any my brewing. My beers brought in five homebrew awards,and I found myself competing at the National level at the GABF Pro/Am. More on that later.

For 2016 I hope to be pushing content at least every other week, so keep your eyes out. Also keep tabs on me on twitter @ihackbeer.

Cheers!

Tuesday, March 3, 2015

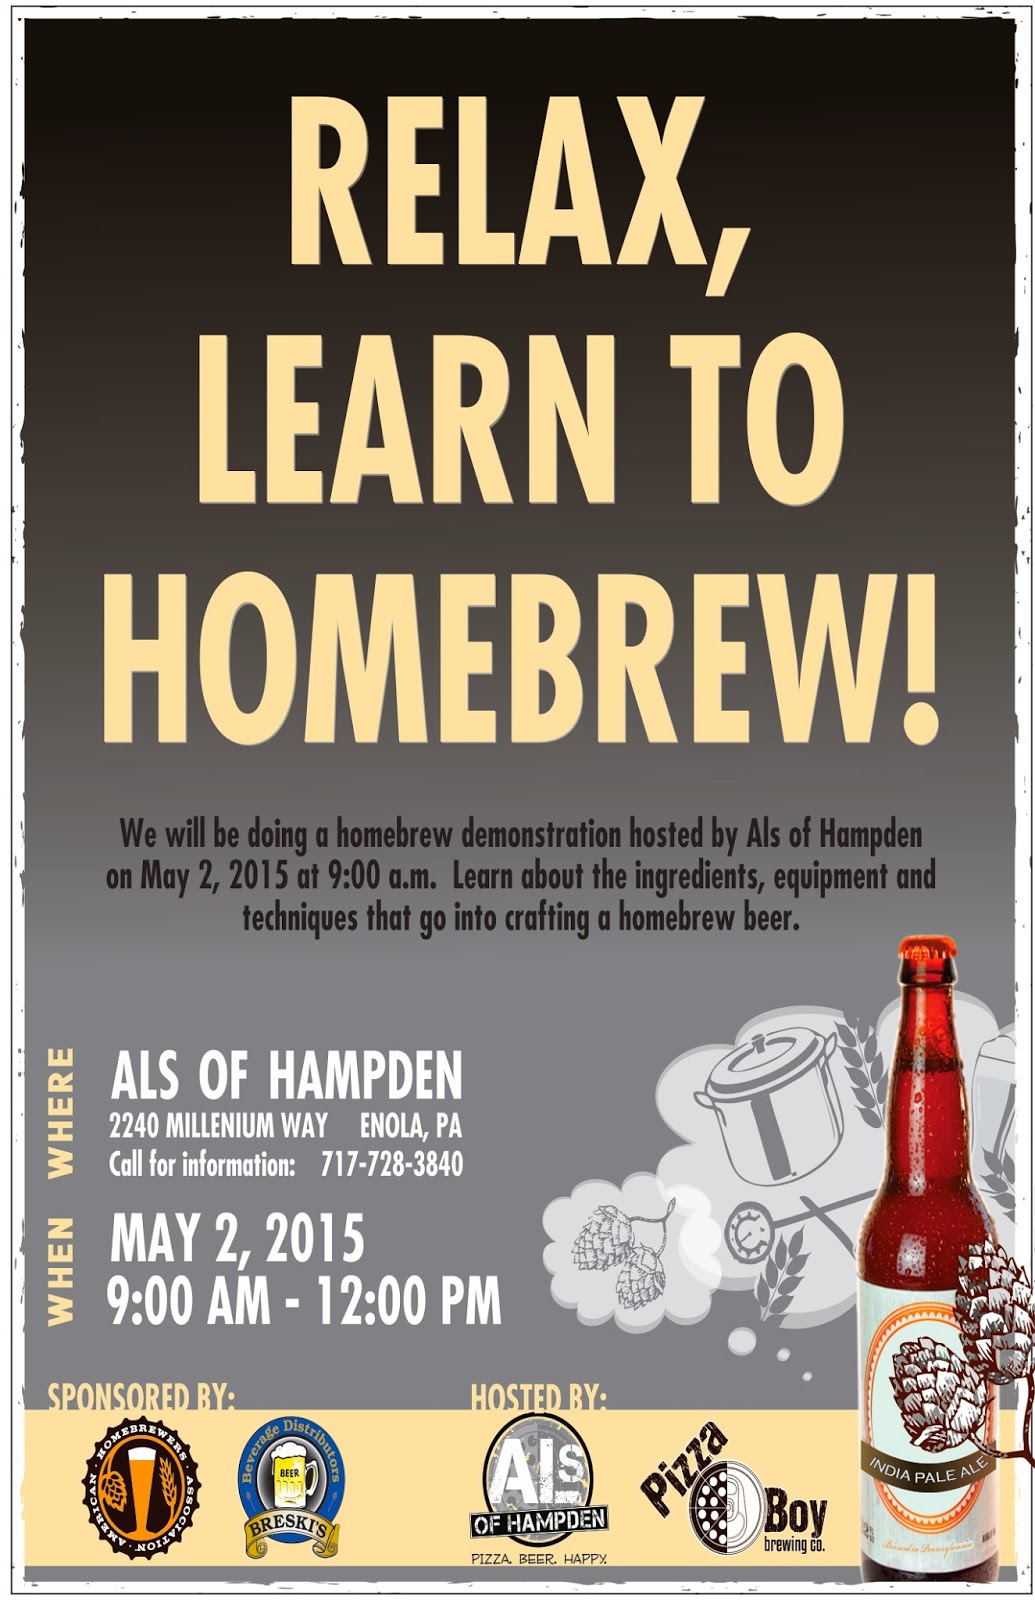
RELAX! Learn to Homebrew! - A Demonstration for National Homebrew Day and Harrisburg Beer Week

Celebrate National Homebrew Day!

Regional Harrisburg Area Brewers member Karl Larson will be doing a homebrew class and demonstration on May 2, 2015 at 9:00am, hosted by Al's Of Hampden. Learn about the ingredients, equipment and techniques that go into crafting a great home brewed beer.

At least five different types of hops and other ingredients will be on hand to experience before they will be used in the demonstration home brewed IPA.

Sponsored by the American Homebrewers Association (AHA)


Saturday, October 11, 2014

An Easy Guide to Yeast Starters

Do you want to guarantee a vigorous fermentation? Use a yeast starter! In this post I will go step by step with instructions to create a yeast starter.

What you will need.
Yeast
Yeast Nutrient (recommended but not necessary)
Pot (boil should only make pot half full)
Thermometer
Funnel
Flask or Jar
Stovetop (heat source)


1. Purchase your yeast and at least a pound of dry malt extract.

2. Prepare the yeast starter at least three days prior to your brew day. You can start earlier and keep the starter (post fermentation cycle) in the refrigerator for up to two weeks...but personally I wouldn't go longer than seven days. A yeast start can use any type of yeast. Smack pack, vial, or dry yeast. I have had success with all. If you use dry yeast, prepare the yeast with 250ML water at 95-105F at least 15 minutes before adding to starter. Cover.


3. Equipment. Boil pot. Make sure your boil pot is big enough to handle water and DME, but doesn't make it half way up the pot. There is the potential for boil overs (significant others get pissed!).

If you have a 1L or 2L Flask, prepare to make the appropriate amount. I always recommend going bigger (aka 2L). No flask, no problem...mason jars also work great. Make sure you wash and sanitize your (post boil) equipment thoroughly, to include flask (jar), thermometer, funnel.

John Palmer says use one pint (470ML approx) per 1/2 cup dry malt extract (DME). If it ain't broke don't fix it...

4. Boil Water: For a 1L starter, add two pints of water to boil pot. Turn heat on...get hot, and boil. Double for 2L.

5. Add DME: For a 1L starter, add one cup of Dry Malt Extract (DME). Again, there is a potential of boil over. Use a pot that will only be half full with water and DME added. Allow the hot break (foam over) to occur and proceed with a ten minute boil. With two minutes left, add 1 teaspoon of yeast nutrient.


6. Chill out!: In your sink (or bathtub / bucket) prepare an ice bath for your pot of DME Wort. Much like brewing a beer, its important to rapidly bring your wort to a yeast 'pitchable' temperature. When the wort is in the ice bath, stir frequently. I find frozen water bottles and other plastic frozen things work well to keep the ice bath temp down.
7. Transfer Wort to Container: Once the wort is around 65-75 degrees (depending on your yeast preferences), prepare to transfer the wort to the SANITIZED flash (jar). Using a SANITIZED funnel, transfer the wort. I prefer to pour half the wort into the flask, add the yeast, then transfer the remaining wort.

8. Aeration: Once wort and yeast have been added to flask (or jar), swirl container vigorously (but not to spill) to allow oxygen to get into wort. If you stirred during the chilling step, this was probably already happening...but yeast loves oxygen so the more the merrier! 

9. Cover: Once the wort has been transfer to the flask (jar) and aerated, and the yeast has been added, you should cover the flask. I prefer to use press and seal or cling wrap. I do the first layer tight across the top of the flask. I then use a thin knife and make four small incisions so CO2 can leave the flask. I then add a second layer of wrap with a cone at the top, and lightly wrap around outside of flask so CO2 can leave flask.


10. Swirl: If you don't have a stir plate (I don't), then every few hours swirl the container. The yeast will thank you later.

11. Store: Place the yeast in an area out of direct sunlight and that is temperature controlled (per your yeast instructions.

12. Pitch: Brew day has arrived. If the yeast has completed the fermentation cycle, and is dormant at the bottom of the flask, pour off the top 50% into your sink and keep the rest. then swirl to create a yeast slurry, and pitch.  Dormancy can be sped up by chilling at least four hours in refrigerator temperatures prior to pitching.

If the starter is in full or partial fermenation, you can either pitch the whole starter, or discard 50% and pitch the remaining starter (after swirling to create a slurry). In my opinion, a full or partial fermentation starter creates a fast fermentation when added to new full batch homebrew wort.

I hope these steps help you create a better environment for your yeast to thrive. Brewers make wort, yeast make beer...but sometimes brewers can help yeast make the most of their destiny! CHEERS!


Thursday, August 14, 2014

Hop Bursting with Leaf Hops or Wet Hops? Use a Hop Back!

Hop bursting, the act of bittering a beer with first wort and adding flavor and aroma additions after flameout is an excellent technique to significantly enhance the hop presence in your beers, but for home brewers it can be difficult to do with whole leaf or wet hops. During extraction of our luscious hot wort from the kettle, we run the chance of clogging our valve with leaf hop matter, making for a sticky end and aggravating end to our brew day. So what other option do we have? A Hop Back!

In "olden days," the English used Hop Backs to run hot wort through leaf hops to filter trub from the beer, while still increasing the flavor and aroma of the finished product by extracting essential hop oils. Today, many modern breweries use Hop Backs, but in a different form...to optimize hop flavor by running wort or beer through an air tight container to infuse the wort/beer with hop oils.

As all-grain home brewers, we have the ability to use a Hop Back as well, by using our mash tun. Most mast tuns have either a finely slotted steel or plastic manifold at the bottom of the container, or a slotted false bottom. By adding leaf hops (instead of malted barley), and running wort into the container, we can obtain the hop oils in a manner that will not boil off the essential oils (such as the boil). I will suggest the container be covered as the wort will still be near boiling (below) and some oils will evaporate and try to leave the container...smelling awesome but not really helping the final flavor/aroma of the beer. Finally, using the manifold or false bottom and a valve, we will remove the newly oiled wort from the hops, chill through a counter-flow chiller, and place into the fermenter. My guess is that I will find significantly less trub than a typical batch due to the filtering of the wet hop cones.